Oreo Mug Cake
Oreo Mug Cake That Doesn’t Turn Rubbery in the Microwave
Mug cakes have a reputation for turning rubbery, and it’s almost always from overcooking by even 10 or 15 seconds, microwaves vary enough in wattage that a timing that works perfectly in one kitchen turns a cake tough in another. Getting a soft, moist Oreo mug cake comes down to slightly undercooking it by design and using crushed cookies and milk in the right ratio so there’s enough moisture to carry it through those last few seconds of residual heat after the microwave stops.
Why This Oreo Mug Cake Stays Soft Instead of Rubbery
Pulling the mug cake out while the very center still looks slightly underset lets residual heat finish the cook without pushing the whole thing past the point of being tender. Using milk instead of water adds fat and protein that keep the crumb moist, water-based mug cakes dry out and toughen up far faster in a microwave. Crushing the Oreos into a fine, not coarse, texture lets them blend smoothly into the batter instead of leaving dry pockets that microwave unevenly. A small amount of oil alongside the milk adds richness that a purely milk-based batter doesn’t quite achieve on its own. Folding a few roughly broken cookie pieces in at the very end, rather than only using crushed crumbs, gives some textural contrast against the soft cake itself.
Quick Information
- Prep time: 3 minutes
- Cook time: 90 seconds (microwave)
- Total time: under 5 minutes
- Servings: 1
- Difficulty: Easy
- Calories per serving: approximately 380
- Most important step: stopping the microwave while the center still looks slightly underset
- Best for: a quick late-night treat, a single-serving dessert fix, no-bake-oven cravings
Ingredients
- 6 Oreo cookies, divided
- ¼ cup all-purpose flour
- 2 tablespoons granulated sugar
- ¼ teaspoon baking powder
- ¼ cup milk
- 1 tablespoon vegetable oil
- ¼ teaspoon vanilla extract
Milk carries fat and protein that a purely water-based mug cake batter doesn’t have, and that difference is a big part of why this version stays tender instead of turning tough and rubbery after even a short time in the microwave.
Crushing 4 of the 6 cookies into fine crumbs, rather than just roughly chopping them, lets them disappear smoothly into the batter so the texture stays even rather than clumping in spots.
You may also like: hot coffee
Recipe Timing
Prep 3 minutes, cook 90 seconds in the microwave, total under 5 minutes. Serves 1. Easy difficulty. American dessert, single-serving treat.
Allergen and Dietary Disclosure
This recipe contains dairy (milk, and Oreos contain milk as an ingredient), gluten (flour, Oreos), and soy (an ingredient in most Oreo cookies). For a dairy-free version, swap the milk for a plant-based milk and use a dairy-free sandwich cookie brand. For gluten-free, use a gluten-free chocolate sandwich cookie and swap the flour for an equal amount of a 1:1 gluten-free blend.
Equipment Needed
- Microwave-safe mug (at least 12 ounces)
- Small bowl or zip-top bag (for crushing cookies)
- Fork or small whisk
A larger mug matters more than it sounds, this batter rises as it cooks, and a mug that’s too small risks overflowing partway through the 90 seconds in the microwave.
Nutrition Information
Per serving: 380 calories, 6g protein, 48g carbohydrates, 18g fat, 2g fiber, 26g sugar, 420mg sodium. This is an estimate based on standard USDA nutrition data for the ingredients listed and will vary by brand and exact portion size.
Why Microwaves Turn Mug Cakes Rubbery So Easily
A microwave cooks by exciting water molecules throughout the batter all at once, rather than building heat gradually from the outside in the way a conventional oven does, which means there’s a much narrower window between undercooked and overcooked. Once the proteins in the egg-free batter firm up past a certain point, continued microwave exposure just keeps tightening that structure further, squeezing out moisture and leaving a dense, chewy texture behind, this is why pulling the mug cake out while it still looks slightly underset in the center matters so much more here than it would with a conventional oven-baked cake.

Preparation
Choose a microwave-safe mug that holds at least 12 ounces, since the batter expands as it cooks. Separate 4 of the 6 Oreo cookies for crushing into crumbs, and set the remaining 2 aside to break into chunks later.
Step-by-Step Method
1. Place 4 of the Oreo cookies into a small zip-top bag and crush them into fine crumbs using a rolling pin or the bottom of a glass, or pulse them in a small food processor if you have one.
2. Add the crushed Oreo crumbs, flour, granulated sugar, and baking powder directly into the mug. Stir with a fork until evenly combined, breaking up any remaining clumps.
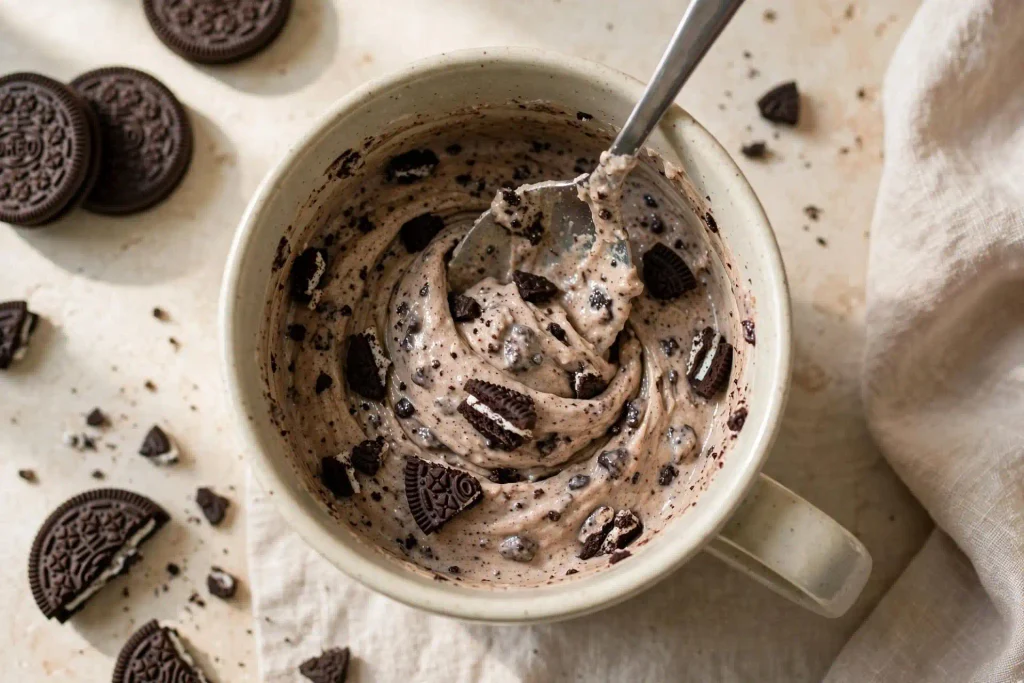
3. Pour in the milk, vegetable oil, and vanilla extract. Stir until the batter is smooth and no dry streaks of flour remain, scraping the bottom and sides of the mug to make sure nothing’s stuck there unmixed.
4. Break the remaining 2 Oreo cookies into rough chunks, not crumbs this time, and fold them into the batter for some textural contrast against the smoother crumb.
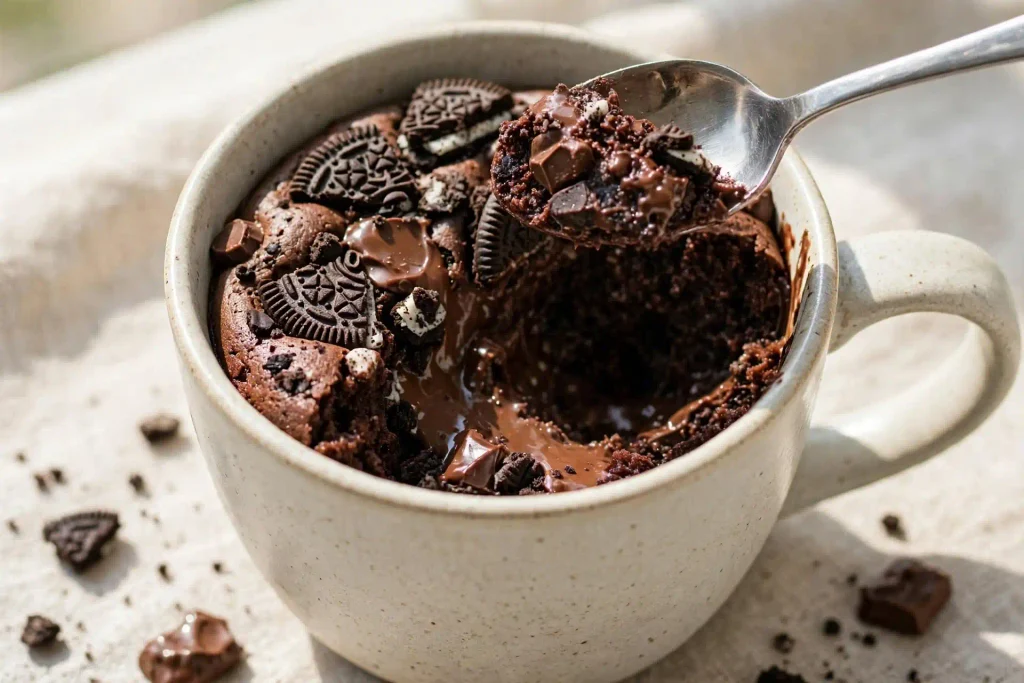
5. Microwave on high for 70 seconds first, checking the center at that point. The edges should look set while the very middle still looks slightly glossy and underset, that’s exactly the stage you’re aiming for.
6. If the center still looks very wet and liquid rather than just slightly underset, microwave in additional 10-second increments, checking after each one, since the difference between perfectly soft and rubbery can happen within just those few seconds.
7. Let the mug cake sit for 1 minute after microwaving before eating, the residual heat continues cooking the center gently during this short rest, finishing the texture without any additional direct heat.
8. Top with whipped cream, a drizzle of chocolate syrup, or an extra crushed cookie if you’d like, though it’s perfectly good eaten straight from the mug with a spoon as is.
Chef’s Note: Microwave wattages vary a lot between models, if your microwave runs lower than 1000 watts, start checking even earlier than the 70-second mark since it may need a bit more total time, or less if yours runs hotter.
Chef’s Note: Don’t walk away during the final increments of cooking. The window between soft and rubbery in a microwave mug cake is genuinely just a matter of seconds, not minutes.
Chef’s Note: If you prefer a gooier, more underdone center similar to a lava cake, pull it at 60 seconds instead and let the residual rest do most of the remaining work.
You may also like: peanut butter chocolate chip cookies
Expert Tips & Tricks
- Make-ahead: Crush extra Oreo crumbs ahead of time and store them in an airtight container for a few days, so the next mug cake comes together even faster.
- Storage: This mug cake is really meant to be eaten fresh, it doesn’t store or reheat particularly well since the texture firms up considerably once fully cooled.
- Use a wide, short mug rather than a tall, narrow one if you have the choice, it cooks more evenly in the microwave since the batter isn’t as deep in any one spot.
- Add a small spoonful of peanut butter to the batter before microwaving if you want a different flavor twist, it blends in well with the chocolate cookie base.
- If your microwave has a turntable, make sure it’s spinning freely, an uneven rotation can cause one side of the mug cake to cook faster than the other.
- Double the recipe in two separate mugs rather than one larger mug if you’re serving two people, cooking two smaller portions gives more even results than trying to scale up a single mug’s worth.
Common Mistakes & Troubleshooting
Mug cake turns out rubbery and tough. It almost certainly cooked a bit too long. Pull it from the microwave while the center still looks slightly underset and glossy, not fully dry, it’ll finish setting during the rest period.
Center stays raw and liquid even after resting. It needed more time in the microwave. Add 10-second increments until the center looks just slightly underset rather than fully wet, checking frequently since this stage moves fast.
Mug cake overflows during cooking. The mug was too small for the batter’s rise, or it was filled too close to the top before microwaving. Use a mug that holds at least 12 ounces and leave some room near the rim.
Texture is gritty instead of smooth. The Oreos weren’t crushed finely enough before mixing into the batter. Take an extra minute to crush them into a fine crumb rather than leaving larger pieces mixed into the base batter.
Cake tastes bland despite the Oreos. The vanilla extract may have been skipped, or the cookie crumbs weren’t distributed evenly through the batter. Make sure everything’s stirred until fully combined before microwaving.
Honest Trade-Off
This mug cake trades the deeper, more complex flavor development of a conventionally baked cake for speed, a microwave simply can’t build the same caramelization or crumb structure an oven produces over a longer bake. If you have more time and want a more polished dessert, a small conventionally baked cake will deliver a more refined result, though nothing matches this for a craving that needs solving in under 5 minutes.
Storage & Make-Ahead
This mug cake doesn’t hold up well once fully cooled, the texture firms considerably and loses the soft quality that makes it worth making in the first place. It’s genuinely best eaten within a few minutes of cooking. Crushed Oreo crumbs for future mug cakes can be prepped ahead and stored in an airtight container at room temperature for up to a week.
Variations & Substitutions
For a peanut butter version, stir 1 tablespoon of peanut butter into the batter before microwaving, it pairs naturally with the chocolate cookie base.
For a mint chocolate version, swap the vanilla extract for ¼ teaspoon of peppermint extract and use mint-flavored sandwich cookies in place of regular Oreos.
For a double chocolate version, add 1 tablespoon of unsweetened cocoa powder to the dry ingredients along with an extra tablespoon of milk to compensate for the added dryness.
Callout: Place the mug on a microwave-safe plate before cooking, in case the batter does overflow slightly despite following the recommended mug size, it saves a sticky cleanup inside the microwave itself.
Serving Suggestions
Oreo mug cake pairs naturally with a scoop of vanilla ice cream on top, which melts slightly into the warm cake for extra richness. A drizzle of chocolate or caramel sauce adds another layer of flavor if you want to dress it up a bit. If you’re craving something else quick and chocolate-forward to round out a dessert spread, pumpkin chocolate chip muffins makes a good next-day option when you have a bit more time to bake. A hot cup of coffee alongside the warm mug cake makes for a cozy late-afternoon treat.
Callout: Let the mug cake sit for the full minute of resting time even if it’s tempting to dig in right away, that short wait is doing real work to finish the texture without any more direct heat involved.
FAQ
Why did my mug cake turn out rubbery?
This almost always means it cooked a bit too long in the microwave. Pull it out while the center still looks slightly underset and glossy rather than fully dry, it continues cooking gently during the rest period after you stop the microwave.
Can I make this without a microwave?
Not really in the same quick format, this recipe is specifically built around microwave cooking times and the batter ratio that works for that method. A small ramekin baked in a conventional oven at 350°F for about 15 to 18 minutes could work, though the texture and timing would need some adjustment.
How do I know when to stop microwaving?
Check at 70 seconds first, the edges should look set while the very center still looks slightly glossy and underset. If it still looks fully wet and liquid, continue in 10-second increments, checking each time since the difference between perfect and overcooked happens fast.
Can I use a different cookie instead of Oreos?
Yes, any chocolate sandwich cookie works as a direct substitute, and even a different flavor like a peanut butter sandwich cookie can work if you’re looking for a different flavor direction entirely.
Is this recipe safe for someone with a dairy allergy?
Not as written, since both the milk and the Oreo cookies themselves contain dairy. Swapping in a plant-based milk and a dairy-free chocolate sandwich cookie brand lets you make a dairy-free version without much change to the method.
One Last Thing
Oreo mug cake comes down to stopping the microwave a few seconds before instinct says to, that slightly underset center is exactly the point, not a sign it needs more time. Once you’ve made it once watching for that specific look rather than following a rigid timer, getting a soft, non-rubbery mug cake becomes pretty easy to repeat every time the craving hits.
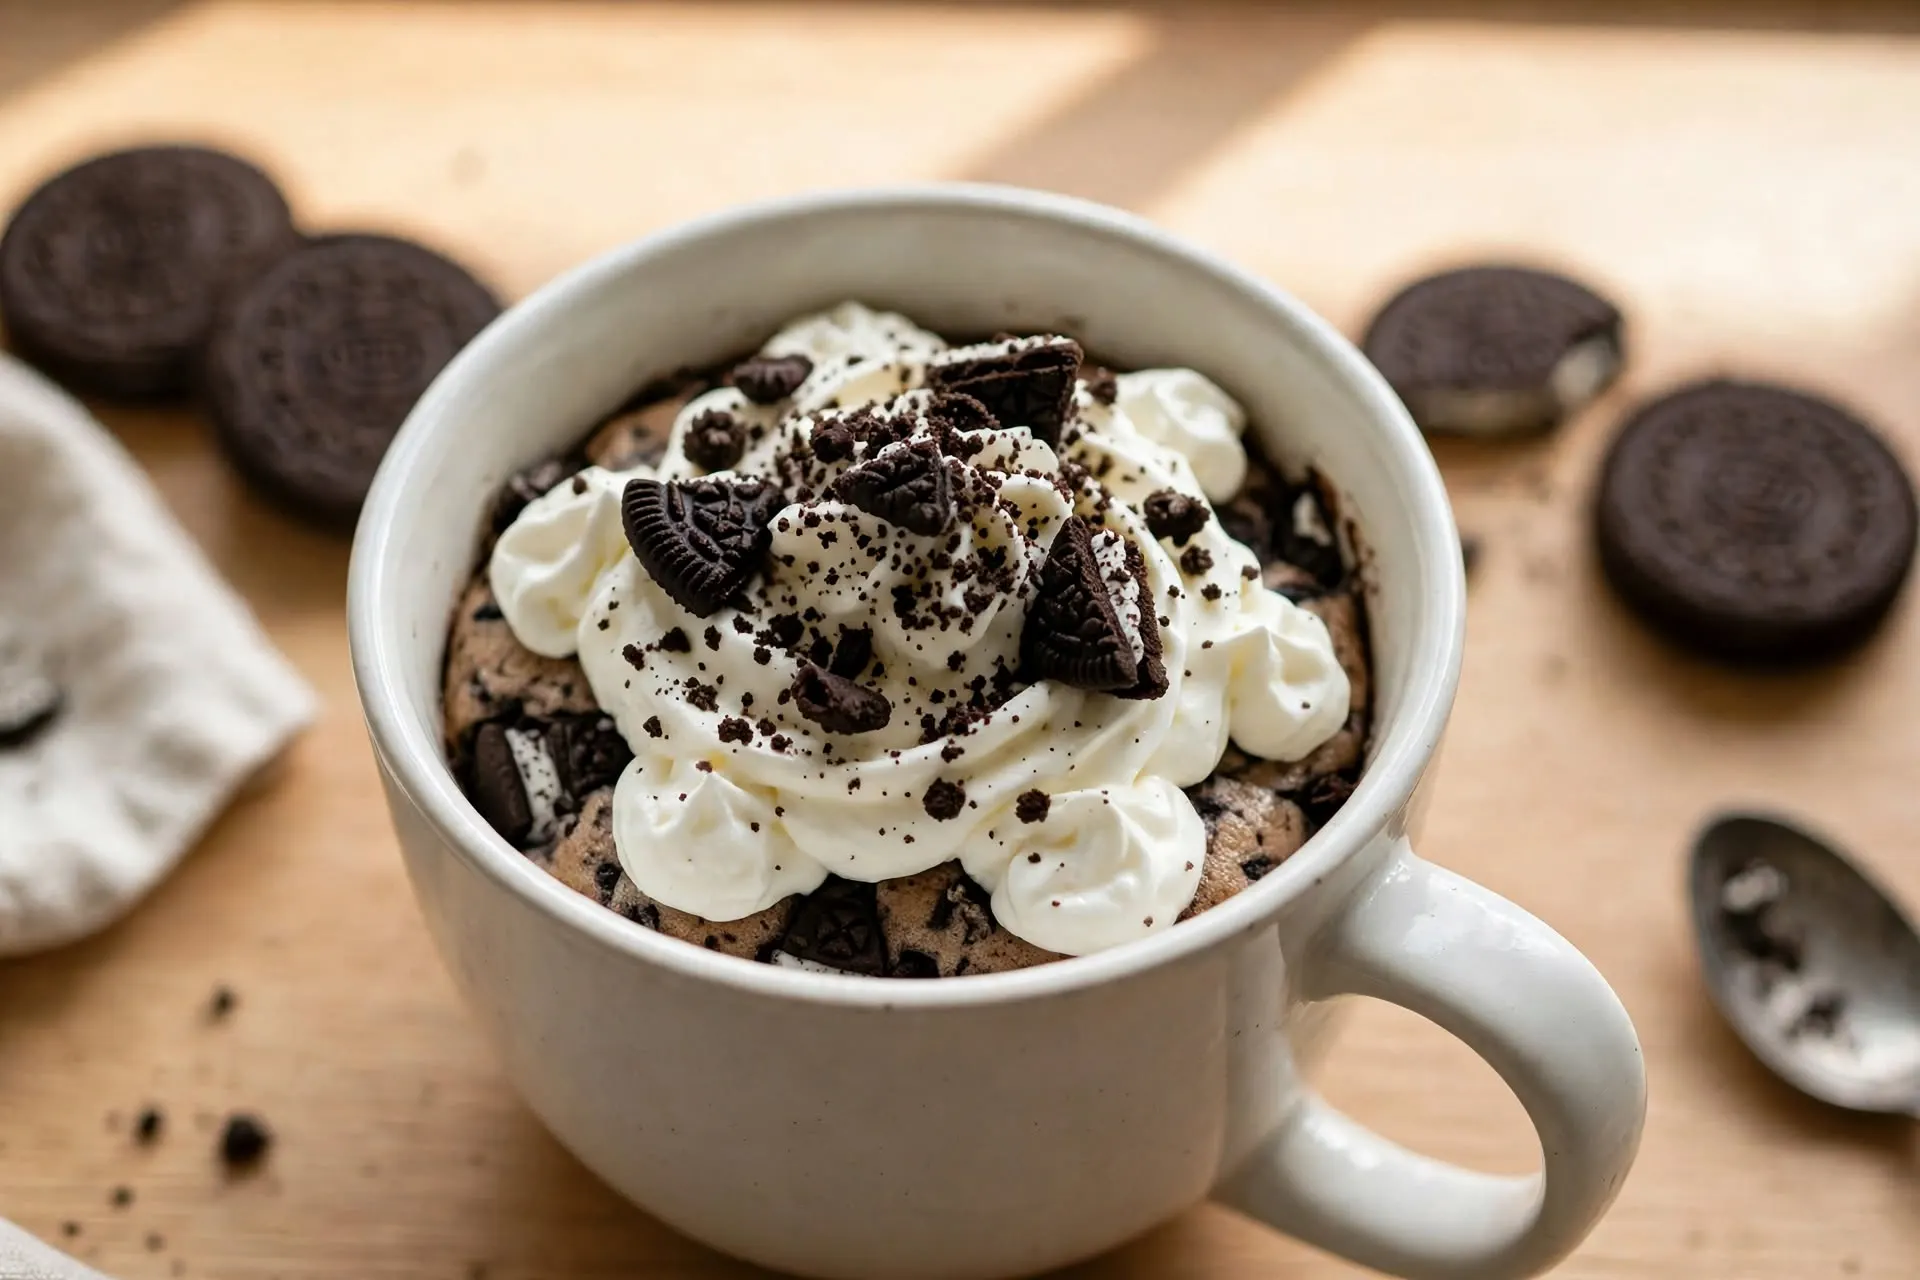
Oreo Mug Cake
Ingredients
Method
- Crush 4 Oreos into fine crumbs. Add to a microwave-safe mug with flour, sugar, and baking powder. Stir to combine.
- Add milk, oil, and vanilla. Stir until smooth.
- Break remaining 2 Oreos into chunks and fold into the batter.
- Microwave on high for 70 seconds, checking the center. Continue in 10-second increments if needed, until edges are set but the center still looks slightly underset.
- Let rest 1 minute before eating. Top with whipped cream or chocolate syrup if desired.