Apple Cider
Homemade Apple Cider That Actually Tastes Like Fall
Store-bought apple cider is just filtered apple juice with a label change half the time. Real homemade apple cider comes from simmering whole, unpeeled apples with warm spices until they break down and release their own natural sweetness into the water, no added sugar required if you pick the right apples. The whole process takes under an hour of mostly hands-off simmering, and the apples do almost all the work themselves.
Why This Apple Cider Tastes Better Than the Store Version
Leaving the apple skins and cores in during the simmer pulls out more pectin and flavor than peeled apples alone can offer, since a lot of an apple’s aromatic compounds sit right under the skin. A mix of sweet and tart apple varieties, rather than just one kind, builds a rounder flavor than a single-variety cider ever manages. Whole spices like cinnamon sticks and cloves release their flavor slowly over the simmer time, without turning the cider cloudy or gritty the way ground spices can. Mashing the softened apples partway through the simmer, instead of leaving them whole, releases more of their juice into the liquid before straining. A small splash of orange juice added near the end brightens the whole pot without making it taste citrusy, just balanced.
Quick Information
- Prep time: 10 minutes
- Cook time: 45 minutes
- Total time: 55 minutes
- Servings: 8 (about 2 quarts)
- Difficulty: Easy
- Calories per serving: approximately 110
- Most important ingredient: a mix of sweet and tart apples
- Best for: fall gatherings, holiday mornings, a warm drink on a cold afternoon
Ingredients
- 8 medium apples, a mix of sweet (Honeycrisp, Fuji, Gala) and tart (Granny Smith) varieties, roughly chopped with skins and cores left on
- 1 orange, sliced into rounds
- 3 cinnamon sticks
- 1 tablespoon whole cloves
- 1 tablespoon whole allspice berries
- 1 piece fresh ginger (about 2 inches), sliced
- ¼ cup brown sugar, optional, to taste
- 10 cups water
- 2 tablespoons fresh orange juice
Mixing sweet and tart apple varieties matters more than people expect, an all-sweet batch tastes one-dimensional, while an all-tart batch needs far more added sugar to balance out.
Whole spices, rather than ground, keep the finished cider clear instead of cloudy, since ground spices leave fine sediment behind even after straining through cheesecloth.
You may also like: apple crumble
Recipe Timing
Prep 10 minutes, cook 45 minutes, no rest time needed, total 55 minutes. Makes about 2 quarts, serving 8. Easy difficulty. American fall beverage.
Equipment Needed
- Large stockpot
- Potato masher
- Fine mesh strainer or cheesecloth
- Wooden spoon
- Ladle
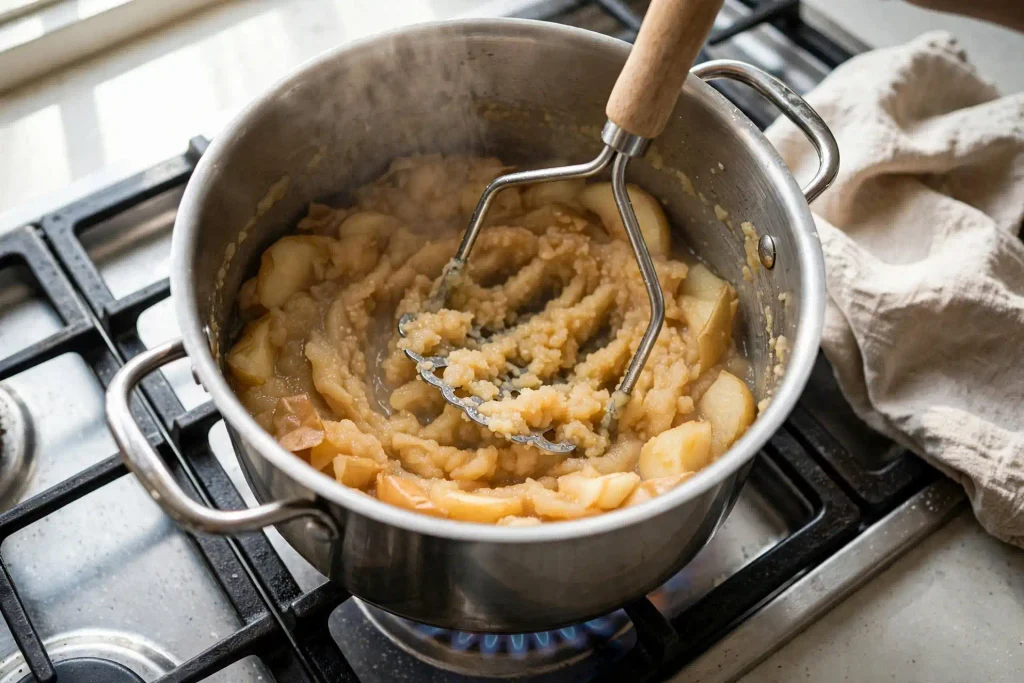
A potato masher is the one tool here that’s easy to skip but shouldn’t be. Mashing the softened apples partway through the simmer releases noticeably more flavor into the liquid than leaving the pieces whole ever does.
Nutrition Information
Per serving (1 cup): 110 calories, 0g protein, 28g carbohydrates, 0g fat, 3g fiber, 24g sugar, 5mg sodium. This is an estimate based on standard USDA nutrition data for the ingredients listed and will vary depending on apple variety and added sugar.
Why Whole Apples Make a Better Cider Than Juice Ever Can
Store-bought apple juice is filtered until it’s completely clear, which strips out a lot of the pectin and fine apple solids that give real cider its characteristic body and slightly cloudy appearance. Simmering whole apple pieces for nearly an hour breaks down their cell walls fully, releasing both the juice and these finer particles into the water, which is exactly what gives homemade cider its fuller texture compared to clarified juice.

Preparation
Wash the apples well since the skins stay on through the whole simmer. Roughly chop them into large chunks, there’s no need for precision here since everything gets mashed and strained later. Slice the orange and ginger ahead of time so everything’s ready to go into the pot at once.
Step-by-Step Method
1. Add the chopped apples, orange slices, cinnamon sticks, cloves, allspice, and ginger to a large stockpot. Pour in the water, making sure the apples are mostly submerged, adding a bit more water if needed to cover them.
2. Bring the pot to a boil over high heat, then reduce to a gentle simmer. A hard boil the whole time can make the cider taste slightly bitter from over-extracting the spices too fast.
3. Let the mixture simmer uncovered for 30 minutes, until the apple pieces have softened enough to fall apart easily when pressed with a spoon against the side of the pot.
4. Use a potato masher to mash the softened apples directly in the pot, breaking them down further to release more of their juice into the liquid. You don’t need to turn them into a smooth puree, just break up the larger pieces.
5. Continue simmering for another 15 minutes after mashing, so the newly released juice has time to infuse with the spices still in the pot.
6. Taste the liquid at this point and stir in the brown sugar if you want extra sweetness, starting with 2 tablespoons and adding more gradually depending on how tart your apple mix turned out.
7. Remove the pot from heat and let it sit for 10 minutes before straining, this short rest lets any remaining fine solids settle slightly, making the straining step cleaner.
8. Strain the cider through a fine mesh strainer lined with cheesecloth into a large bowl or pitcher, pressing gently on the solids with the back of a spoon to extract any remaining liquid without forcing pulp through.
9. Stir in the fresh orange juice once the cider has been fully strained. Adding it after straining, rather than during the simmer, keeps its brightness from cooking off.
10. Serve warm immediately, or let it cool to room temperature before transferring to the fridge if you’re making it ahead.
Chef’s Note: If your cider tastes flat after straining, a small pinch of salt, not more sugar, often fixes it faster by making the existing sweetness more noticeable.
Chef’s Note: Don’t skip the mashing step. It’s the single biggest difference between a thin, juice-like cider and one with real body.
Chef’s Note: Save the strained apple solids for a quick applesauce instead of tossing them, they’re already soft and lightly spiced from the simmer.
You may also like: white chicken enchiladas
Expert Tips & Tricks
- Make-ahead: This cider keeps well made up to 4 days ahead, and the flavor actually deepens slightly as the spices continue to mellow into the liquid over the first day or two.
- Storage: Store in an airtight container or pitcher in the fridge for up to 5 days, giving it a good stir or shake before serving since some separation is normal.
- Warm leftover cider gently on the stove rather than in the microwave, it heats more evenly and won’t scald the bottom layer the way a microwave can.
- Add a splash of bourbon or dark rum to an individual mug if you’re serving this for adults at a gathering, the warm spices pair well with either.
- Freeze extra cider in ice cube trays if you won’t finish it in time, the cubes work well for chilling a future batch of iced cider without watering it down.
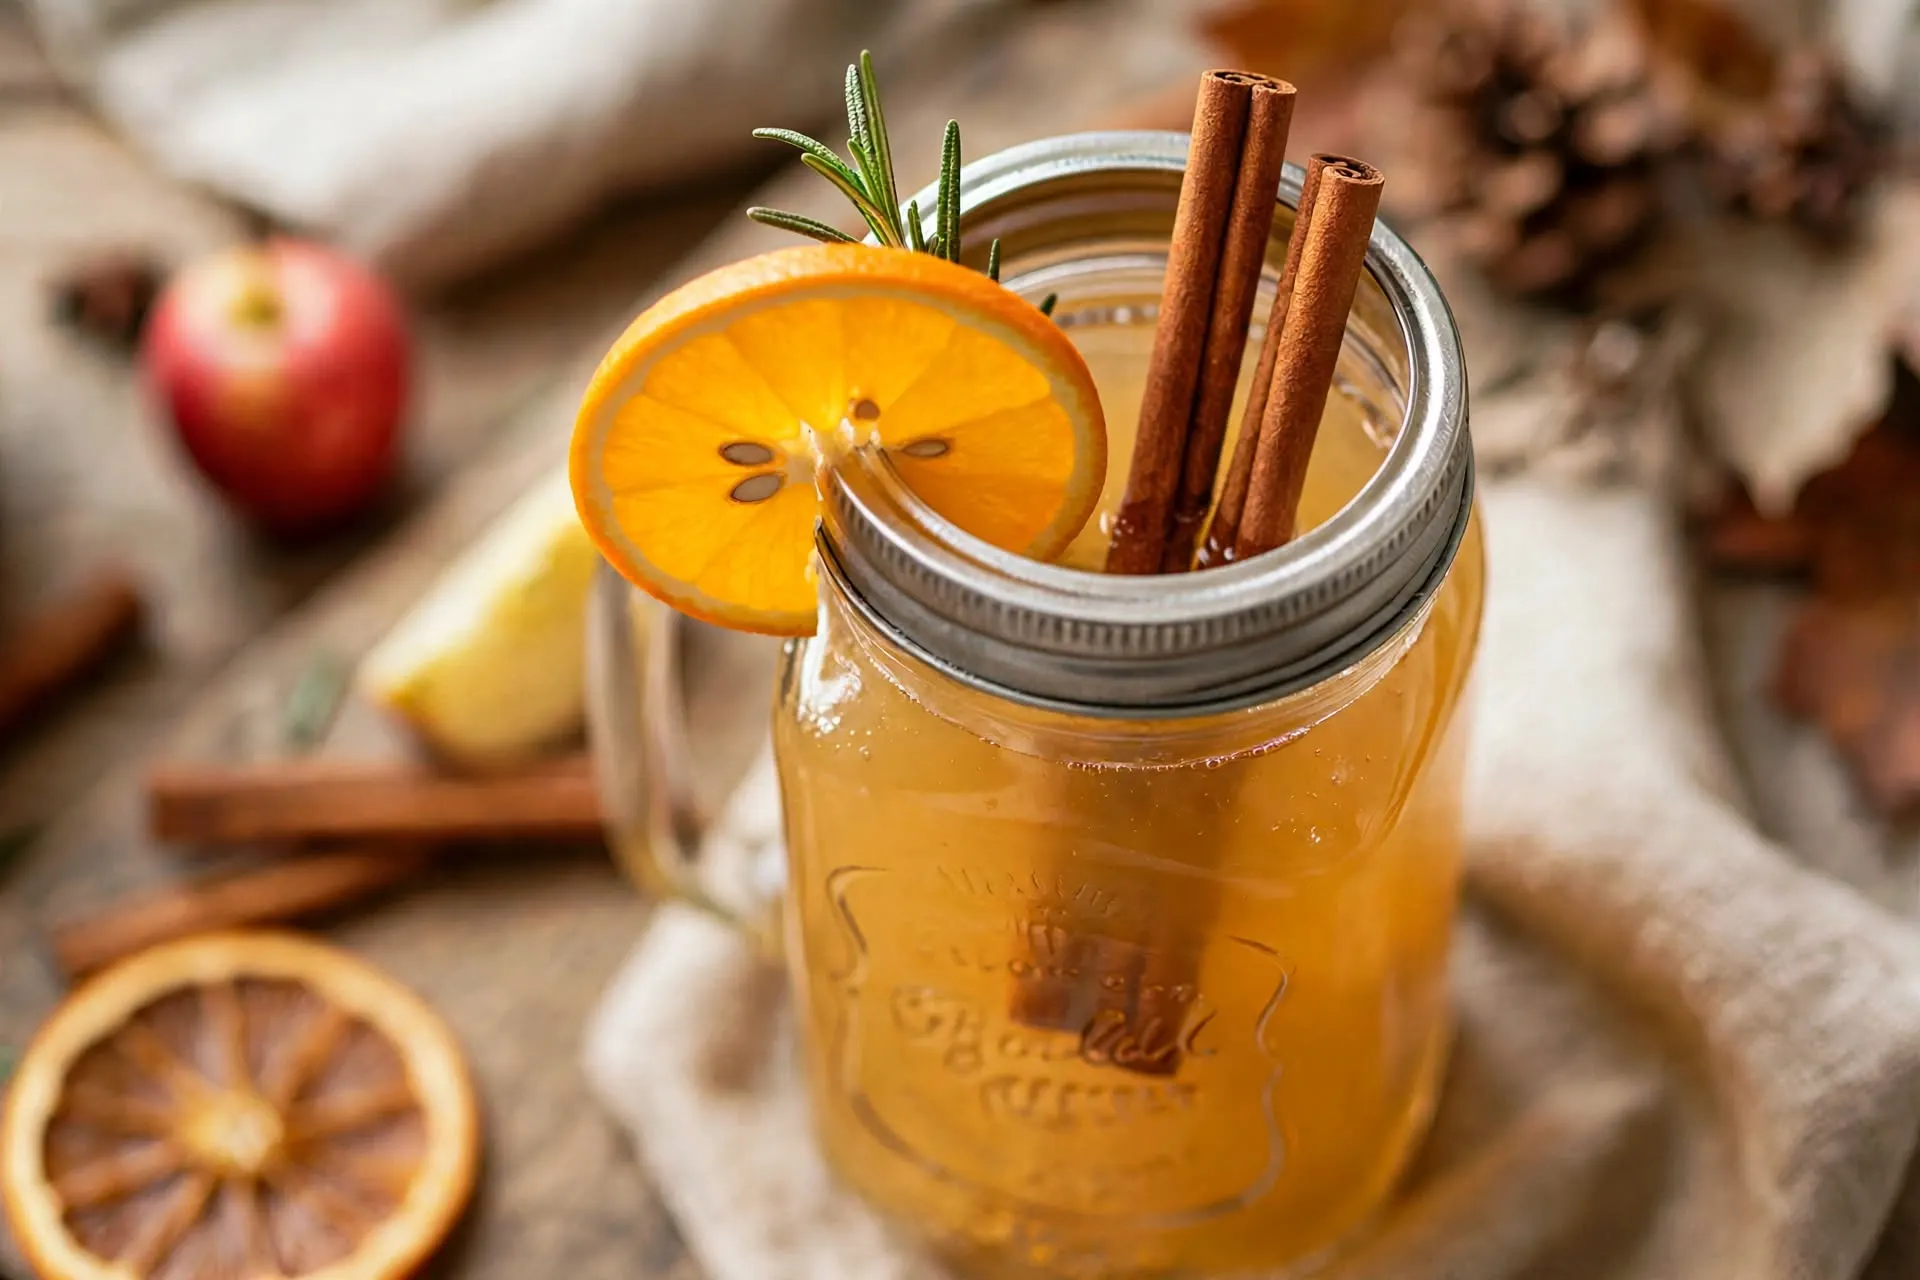
- A cinnamon stick dropped into each mug when serving adds a nice visual touch and lets guests stir with it for extra flavor as they drink.
Common Mistakes & Troubleshooting
Cider tastes watery and thin. The apples weren’t mashed, or the simmer time was cut short before they fully softened. Give it the full 30 minutes before mashing, and don’t rush the second simmer after.
Cider turns out too tart. The apple mix leaned too heavily toward tart varieties like Granny Smith. Add brown sugar gradually at the tasting step, or rebalance the mix next time with more sweet varieties like Honeycrisp or Fuji.
Cider tastes bitter. Likely from boiling too hard instead of keeping it at a gentle simmer, which over-extracts the spices faster than they’re meant to release flavor. Keep the heat low enough that the liquid is just barely bubbling.
Finished cider looks cloudy and gritty rather than smooth. The straining step was rushed, or cheesecloth wasn’t used along with the mesh strainer. Let the cider rest the full 10 minutes before straining, and don’t force pulp through by pressing too hard.
Spice flavor is too faint. The whole spices may have been added too late, or the simmer time was shortened. Add them at the very start alongside the apples so they have the full cook time to infuse.
Honest Trade-Off
Homemade cider takes close to an hour from start to finish, compared to store-bought cider that’s ready the second you open the carton. If you need something on the table in five minutes, a good store-bought cider warmed with a cinnamon stick dropped in is a reasonable shortcut, though it won’t have the same body or depth this version builds from real apples.
Storage & Make-Ahead
Store in an airtight pitcher or container in the refrigerator for up to 5 days. Reheat gently on the stove over low heat, stirring occasionally, rather than microwaving a full batch at once. This cider freezes well for up to 3 months in a freezer-safe container, leaving an inch of headspace since liquid expands as it freezes.

Variations & Substitutions
For a spiced version with more kick, add 2 star anise pods and a split vanilla bean along with the other whole spices.
For a lighter version, reduce the water by 2 cups for a more concentrated cider, diluting individual servings with hot water to taste.
For iced cider, let the finished batch cool completely and serve over ice with a fresh orange slice, it holds up surprisingly well cold despite being designed as a warm drink.
Callout: Toast the whole spices in a dry pot for 30 seconds before adding the apples and water. It wakes up their oils and gives the finished cider a slightly deeper spice flavor than adding them in cold.
Serving Suggestions
Apple cider pairs naturally with warm baked goods, a slice of something cinnamon-forward on the side rounds out the whole fall spread. If you’re setting up a dessert table alongside it, chocolate chip banana bread makes an easy pairing that doesn’t compete with the cider’s spice. Serve it in clear glass mugs when you can, the color of the finished cider is part of the appeal and gets lost in an opaque cup.
Callout: Keep a small bowl of extra cinnamon sticks and orange slices on the table for guests to garnish their own mugs. It turns a simple pour into something that feels a bit more intentional.
FAQ
Can I make apple cider ahead of time for a party?
Yes, it keeps well in the fridge for up to 5 days and the flavor actually improves after the first day as the spices continue to mellow in. Reheat gently on the stove before serving rather than microwaving the whole batch at once.
Why did my cider turn out thin instead of thick and rich?
This almost always means the apples weren’t mashed partway through, or the first simmer was cut short before they fully softened. Give the apples the full 30 minutes to break down before mashing them directly in the pot.
What apples work best for homemade cider?
A mix of sweet and tart varieties gives the best balance, Honeycrisp or Fuji for sweetness, Granny Smith for tartness. Using only one type tends to taste either flat or overly sharp depending on which you pick.
How do I know when the apples have simmered long enough?
Press a piece against the side of the pot with a spoon, it should fall apart easily with light pressure. If it still holds its shape, give it another 5 to 10 minutes before moving to the mashing step.
Can I make this cider without any added sugar?
Yes, if your apple mix leans sweet, you likely won’t need any at all. Taste the liquid after the second simmer and add sugar gradually only if the apples themselves didn’t bring enough natural sweetness.
One Last Thing
Apple cider made from whole apples instead of store-bought juice has a completely different texture and depth, and most of that difference comes down to patience rather than any complicated technique. Give the apples their full simmer time and don’t rush the mashing step, and the pot does almost everything else on its own.
Homemade Apple Cider
Ingredients
Method
- Combine apples, orange slices, spices, and ginger in a stockpot. Cover with water.
- Bring to a boil, then reduce to a gentle simmer for 30 minutes, until apples soften.
- Mash the softened apples directly in the pot, then simmer another 15 minutes.
- Taste and stir in brown sugar if desired. Let rest 10 minutes off heat.
- Strain through a fine mesh strainer lined with cheesecloth, pressing gently on solids.
- Stir in fresh orange juice. Serve warm or chill for later.